Tutorials · Detection and adaptation
Getting started with the detection and adaptation
Walkthroughs, in order, showing what you will see on screen. For a precise question rather than a lesson, the help page answers faster.
This tutorial as a PDF All tutorials in one document
Adapt a line that fits the mouth
The adapter writing the target version, who wants to know while writing whether it will hold. · 10 minutes
Write in the adaptation column
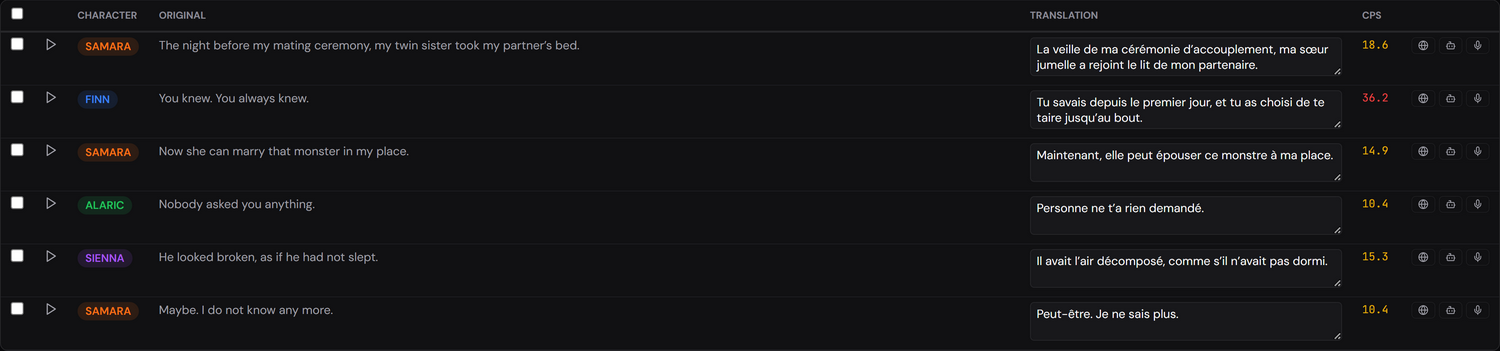
The original and the adaptation sit side by side, each with its timecode. You write while looking at the original, not from memory.
Read the rate while writing
The characters per second figure updates on every keystroke. Green: it fits. Yellow: there is room left. Red: the actor will not manage it. Thresholds depend on the line’s length, one speaks faster over three seconds than over half a second.

See the labials
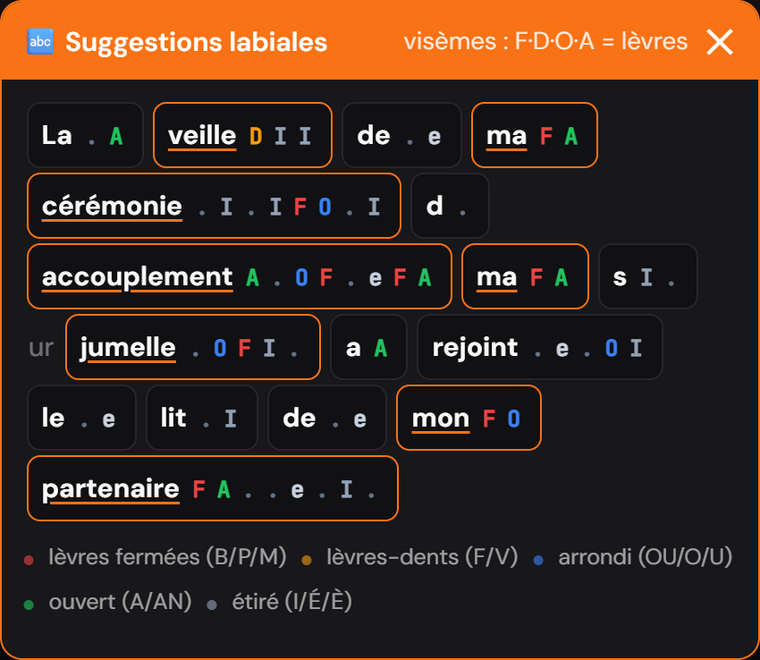
The consonants that close the mouth (B, P, M) and those that bite it (F, V) are marked on the text. That tells you whether your line lands where the actor’s lips close.
The 77,288-entry lexicon is inside the application. This step works in the booth, on a train, or on a programme that is not allowed to leave the studio.
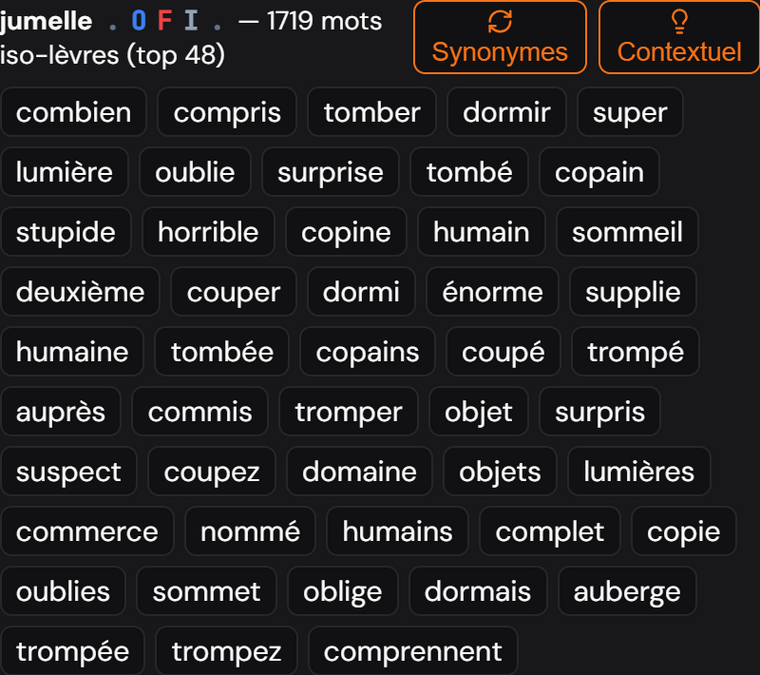
Ask for another word
Double-click a word to get synonyms and expressions filtered by viseme: only those that keep the same mouth shape. That is where the tool saves time, hunting for a labial synonym by hand is the slowest gesture in the trade.