Getting started with the rythmo band
Walkthroughs, in order, showing what you will see on screen. For a precise question rather than a lesson, the help page answers faster.
This tutorial as a PDF All tutorials in one document
Align a rythmo band on an episode
You receive an episode and its script. Here is how to turn that into a band you can record from. · 15 minutes
Load the episode
The band is built from the script’s timecodes. Script imports an SRT, a DetX, an Excel or a Word file; Vidéo loads the film from disk, URL and YT from an address. Video is not required in order to write, but without it you get neither the waveform under the text nor playback.

Set frame rate and reference, before anything else
i/s is the programme’s frame rate: 25 for European television, 24 for cinema. TC réf is the timecode origin. 10:00:00:00 is the dubbing convention: that is why an episode starting at zero displays as ten hours.
Set both before aligning anything. Changing the frame rate afterwards redefines the length of a frame, and every alignment you made by hand drifts by that much.
Choose the reading density
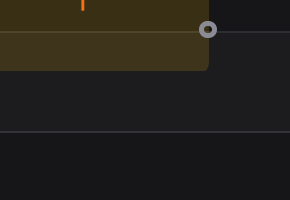
Three track heights. Serrée (tight) shows a whole scene’s structure at a glance, that is the view below. Large (wide) reads from a distance, in the booth. The setting is remembered between sessions.

Select a block and read its state
Clicking a block reveals its bar: in and out timecodes, duration, then the reading rate in characters per second. The colour is a judgement, not decoration. Green: the text fits the window. Yellow: there is room left, like the 15 cps below. Red: the actor will not be able to say it. Thresholds depend on the block’s length, because one speaks faster over three seconds than over half a second.

The line’s seven commands
The same bar carries everything you do to a line. ▷ plays it. ⚡ snaps it to the voice, using the word timecodes from the transcription. ✂ cuts at the cursor, ⑃ merges it with the next. T opens the labial suggestions, synonyms that keep the same mouth shape. 🤖 rewrites it to fit its window. 🗑 deletes it. Recording, on the other hand, lives in its own bar just above the band — always visible, whether a line is selected or not.
Deleting lives only here. It used to sit on the block itself, in a five-pixel square: an irreversible action one misclick away, on every line of the episode. It now requires selecting the line first.

Align frame by frame, from the keyboard
The orange line lists the four gestures. Ctrl+←/→ moves the block’s end, Ctrl+Shift+←/→ its start, Ctrl+Alt+←/→ the whole block without changing its length, Ctrl+↑/↓ moves it to another track. Each press is one frame, a twenty-fifth of a second at 25 fps. Keys 1 to 9 reassign the character without leaving the keyboard.
The shortcut works even when the cursor is inside the block’s text, the most common case, since one aligns while re-reading.

Fix the overruns
✂ Ajuster les débordements goes through the episode, finds lines too long for their window and rewrites them to fit, character, series bible and rhythm preserved. On a single orange badge, the same gesture handles one line only. Ctrl+Z undoes it.
This command calls the AI, so it uses your own access and budget. Everything else on this page works offline.

Export the band
DetX is the booth format, in original or adapted version. SRT and VTT go to subtitling, TXT to proofreading on paper.

Record an actor in a home studio
An actor records from home, straight inside the application: their band filtered to their own role, with the microphone wired to the record button. · 5 minutes to get familiar, then the length of the episode being recorded
Open the episode
An actor does not need to set everything up themselves: if the adapter already prepared the project, Ouvrir un projet (open a project) in the Fichier menu is enough. Otherwise, Vidéo loads the film from disk (or URL / YT from an address), and Script imports the text — SRT, DetX, Excel or Word.
Pick the role
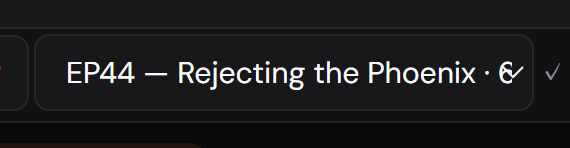
The Rôle menu lists the characters present in the episode. It is filled from the script: no prior setup is needed.
What the filter changes, and what it does not
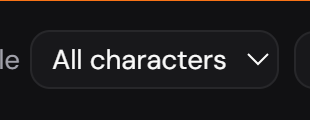
The band now shows only the chosen character’s lines, and a banner states which one. The timecodes do not move. That is deliberate: a band compressed onto one role’s lines would no longer match the picture, and the recording would land off. So the actor sees the others’ silences, those are their cues.

Export the role sheet
📄 Feuille de rôle gives the character’s lines in film order, timecoded, with the word count, useful when an actor is paid by the line.

Record the whole band in one go
🎬 Enregistrer la bande (record the band), in the dedicated bar above the band, starts the video and the microphone together: the video’s own sound is muted automatically so it does not bleed into the take, and every line records at its timecode, with no need to stop at each one.
This bar is always visible as soon as Rythmo opens. Buttons grey out rather than disappear, with a tooltip explaining why — two more discreet placements were tried before this one, and a real actor never noticed either of them.

Pause without losing anything
⏸ Pause stops right where you are, without sending anything. During the pause, you can ▶ Écouter (listen to) a line already recorded or ↺ Refaire ce bloc (redo this block), which rewinds to the start of the line under the playhead and stops, ready to re-record. ▶ Reprendre l’enregistrement (resume) continues exactly where you left off.

Finish and send
✓ Terminer et envoyer (finish and send), available once paused, closes the session and delivers one single file for the whole band, every line placed at its timecode — not one take per line to stitch back together. The file is named after the character, the project and the take number.
No accidental upload mid-session: Pause only pauses, this button alone delivers. So you can breathe, listen back, redo a block, then resume, without risking delivery of an incomplete band.
Correct a word across the whole episode
A misspelled name, a series-bible term changed mid-season, a form of address to revise on one role only. · 2 minutes
Search
Type into Rechercher…. The counter shows position and total; ◀ ▶ move between occurrences, and Enter / Shift+Enter do the same without leaving the keyboard. Aa makes the search case-sensitive.

Limit it to one character
The search follows the Rôle filter. If a character is selected, only their lines are scanned, including by Tout (all). That is what lets you revise one role’s form of address without touching the others.
It is also this tool’s trap: a replacement that appears to have done nothing is almost always a role filter left active. Switch back to “all characters” before concluding.

Replace
Remplacer handles the current occurrence; Tout handles the whole episode, within the chosen role. A global replacement counts as a single undo step: Ctrl+Z reverses all of it.