Tutorials · Project management
Getting started with project management
Walkthroughs, in order, showing what you will see on screen. For a precise question rather than a lesson, the help page answers faster.
This tutorial as a PDF All tutorials in one document
Create a project and assign it
An episode comes in. It has to exist in the console before it can be handed out. · 5 minutes
Create the project
A name, a code, and above all the programme duration in minutes. That is the pay base for every role except voice actors, who are paid by the line: without it, no per-minute assignment can be made.

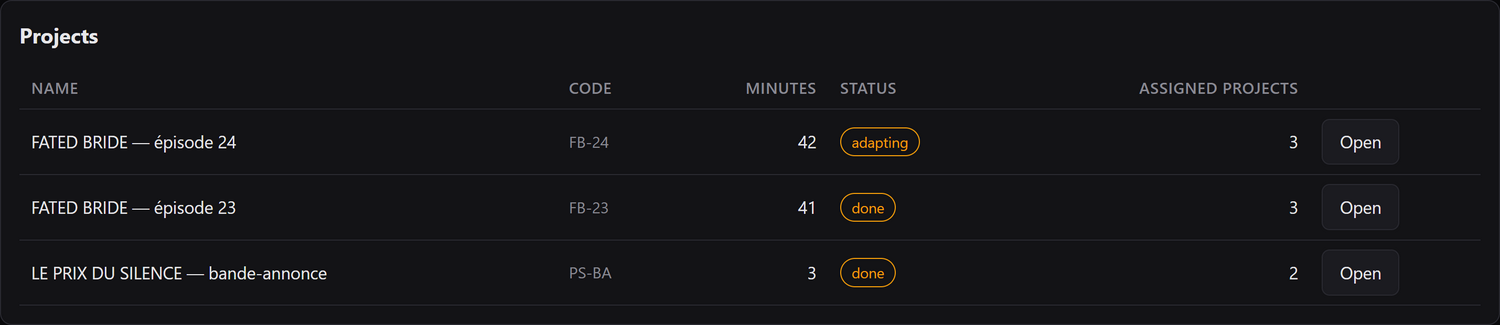
Find the project in the list
The list shows each project’s state and how many assigned projects hang off it. Open unfolds the sheet: that is where everything happens.
Hand out the work
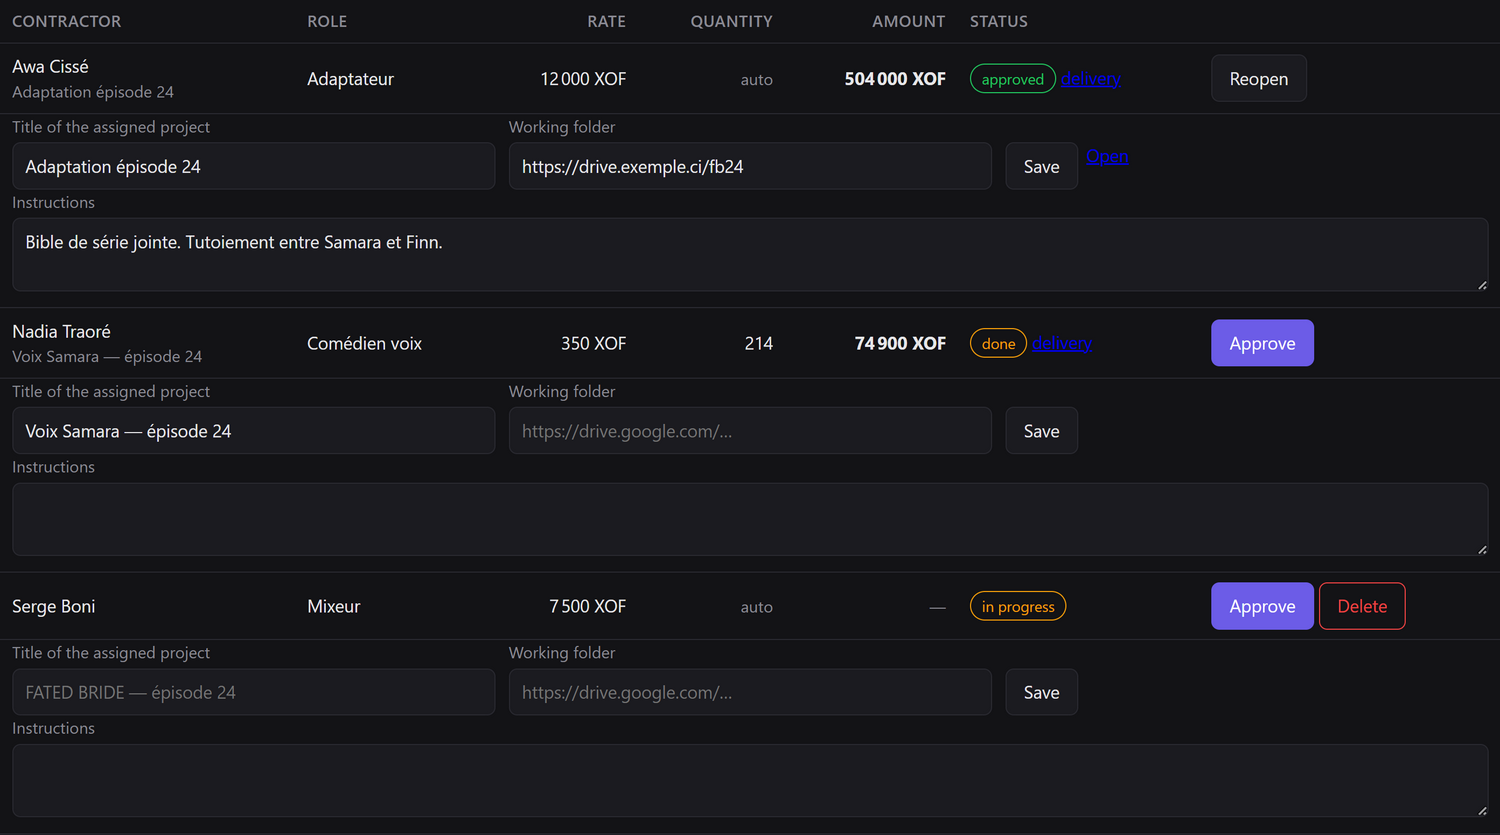
A contractor, a role, a due date, and the working folder — video, DetX, script, series bible. The amount comes from the role’s rate and the programme duration; quantity is only entered for a line count or imposed minutes.
The contractor’s usual role only pre-fills the field. The assignment’s role is what decides the pay: an adapter lending their voice on one episode is paid by the line there, not by the minute.

Track what has been handed out
Each row carries its rate, quantity, amount and state. The title and the instructions stay editable until the work is approved: that is what the contractor sees on their side.
Invite a contractor
A voice actor, a mixer, an adapter: they need their own access before receiving any work. · 2 minutes
Send the invitation
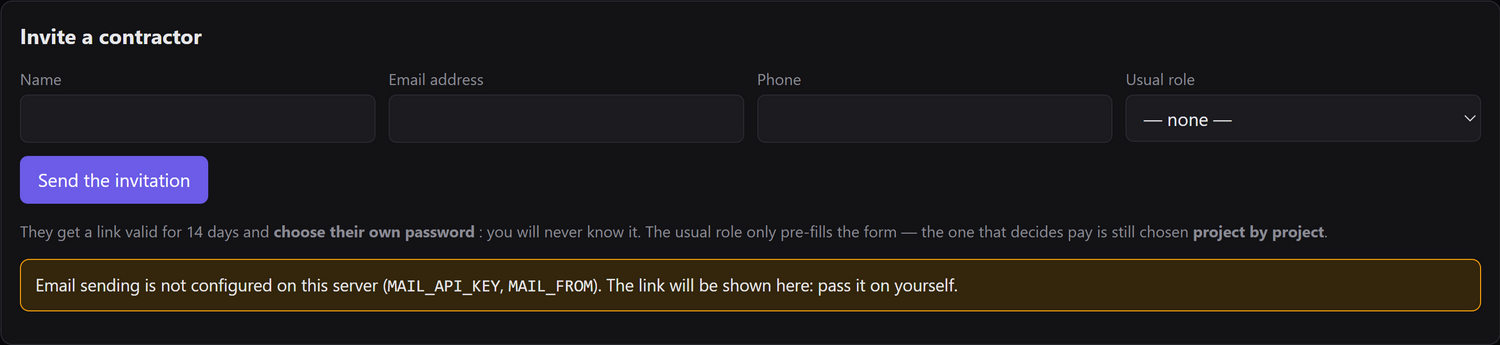
A name, an address, a usual role. They get a link valid for 14 days and choose their own password: you will never know it.
If e-mail sending is not configured on the server, the console shows the link rather than swallowing it: you pass it on yourself. An invitation that fails silently is a person left waiting.
Track pending invitations
Sent, to be passed on, or failed: the state is stated. Resend mints a new link, and the old one stops working at once.

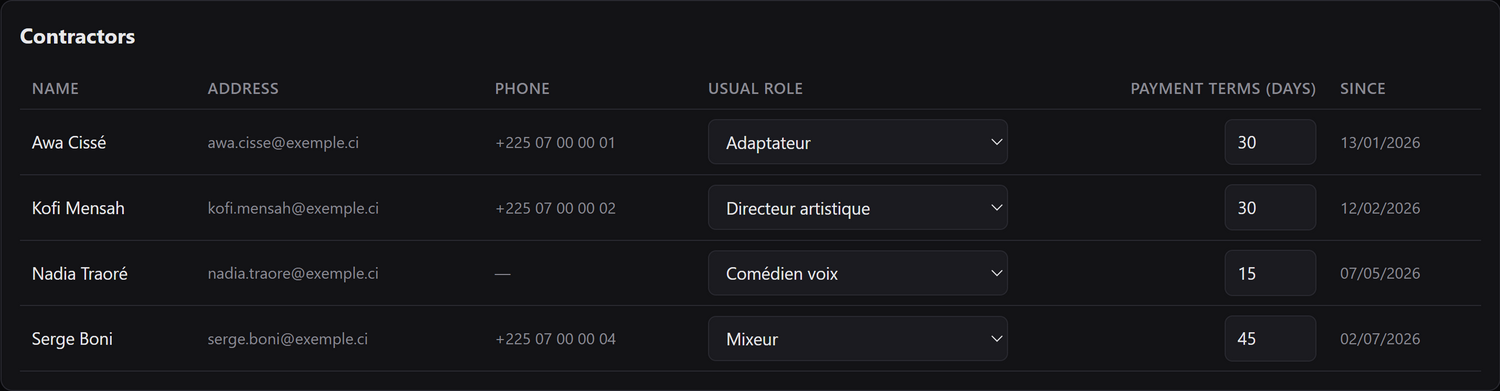
Set the usual role and payment terms
The payment terms belong to each contractor: they set the due date of their invoices, and therefore what shows up in your upcoming outgoings.
Approve the work, then invoice
The work has been delivered. It has to be frozen, then paid. · 3 minutes
Approve what came back
Approving freezes the amount. Changing it afterwards requires reopening the assignment — a sum owed is never corrected quietly, and that is what makes the console hold up between you and your contractor.
Generate the contractor’s invoice
The invoice is built from the approved work: nothing to retype, nothing to recount. Each line points back to the assignment that justifies it.

Track the invoices
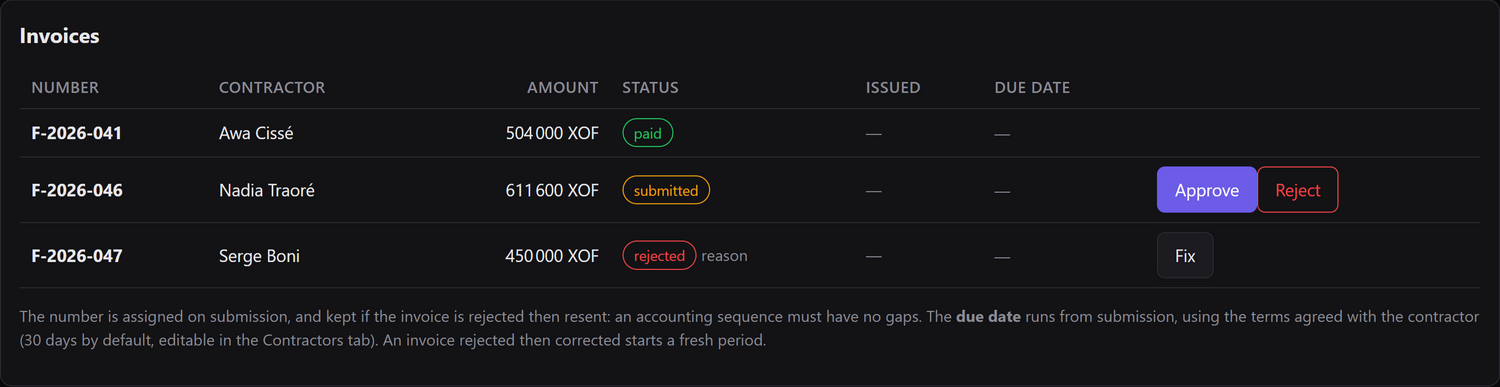
Submitted, paid, rejected — and the reason for a rejection stays attached to the invoice. A rejection with no written reason gets re-argued by phone, and nobody remembers the same thing.
Read the dashboard
Knowing what the studio earned, what it owes, and which project actually pays. · 5 minutes
Choose the period
Week, month, year, or since the beginning. Revenue, costs and contractor accounts follow this choice; deadlines do not — they look ahead.
An all-time figure says nothing about the current financial year, and still passes for a result.

Read the overview
Billed and collected are deliberately separate: an issued invoice is not cash. On the right, what you still owe contractors, and what you have already paid them.

Watch the deadlines
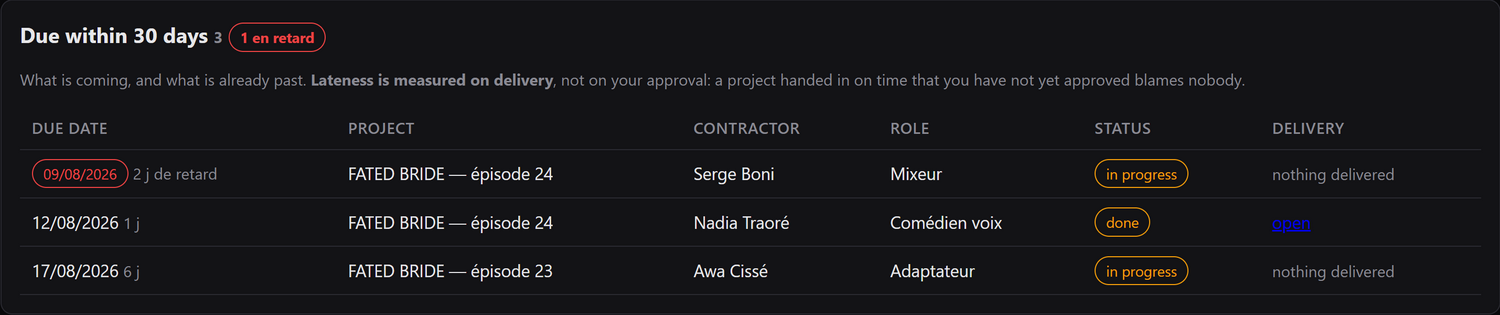
Thirty days ahead, plus what has already gone by. Lateness is measured on delivery, not on your approval: work delivered on time that you have not yet approved accuses nobody.
See what each project earned
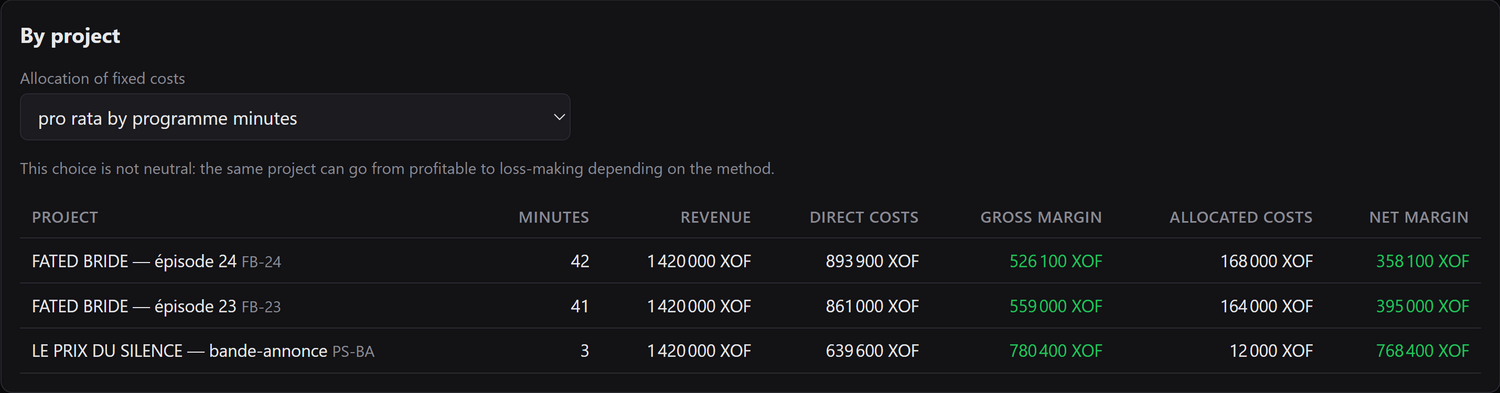
Revenue, direct costs, gross margin, then fixed costs allocated — pro rata by minutes, pro rata by cost, or not at all. That choice is not neutral: the same project swings from profitable to loss-making depending on the method.
Record revenue and costs
What the client pays, what the studio spends. Without both, the dashboard says nothing. · 5 minutes
Invoice a client
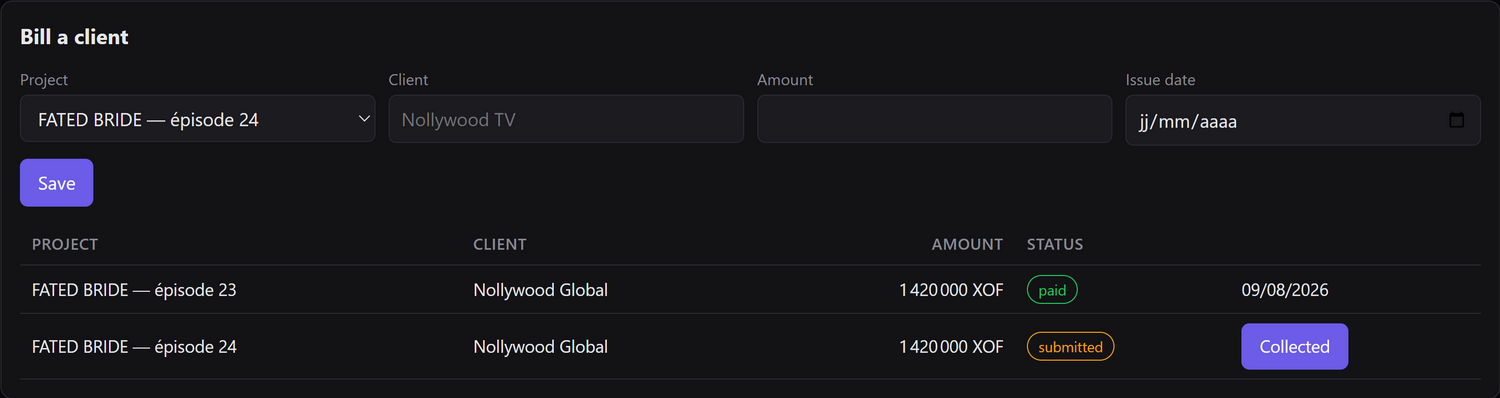
A project, a client, an amount, an issue date. The invoice stays issued until you mark it collected: that is what separates, on the dashboard, what is billed from what is in the bank.
Enter an expense
Supplier, label, amount, category — and the project, if the expense belongs to one. An expense attached to a project counts in its direct costs; with no project, it stays a studio overhead.
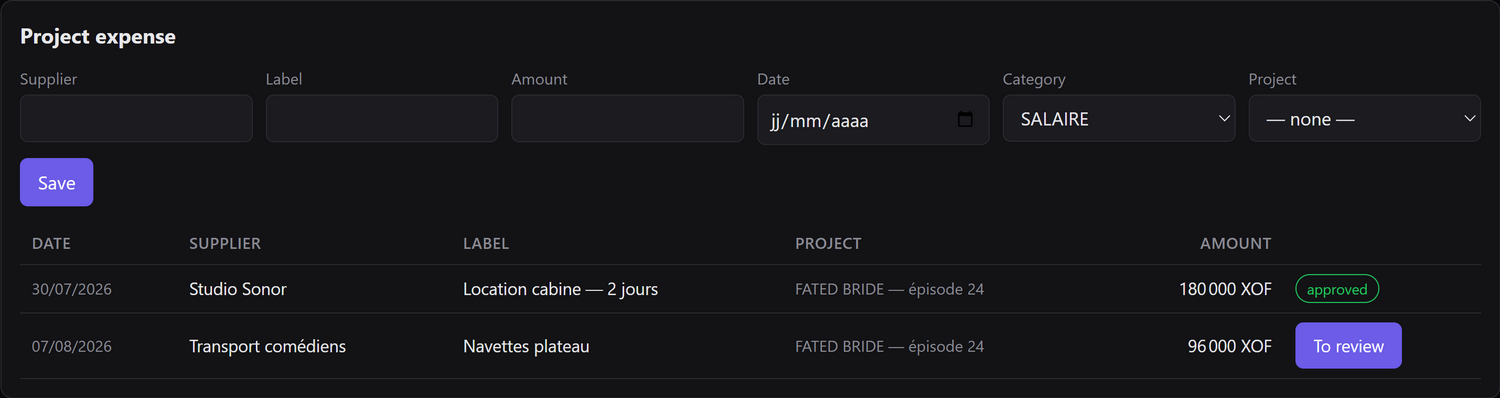
Import a supplier invoice
Drop in the PDF or the photo: the document is read and the expense created pending review. It counts in no total until you have approved it.
That is deliberate: automatic reading sometimes misreads a digit, and a wrong cost travels all the way to the project’s margin. A visible queue beats a silently wrong total.

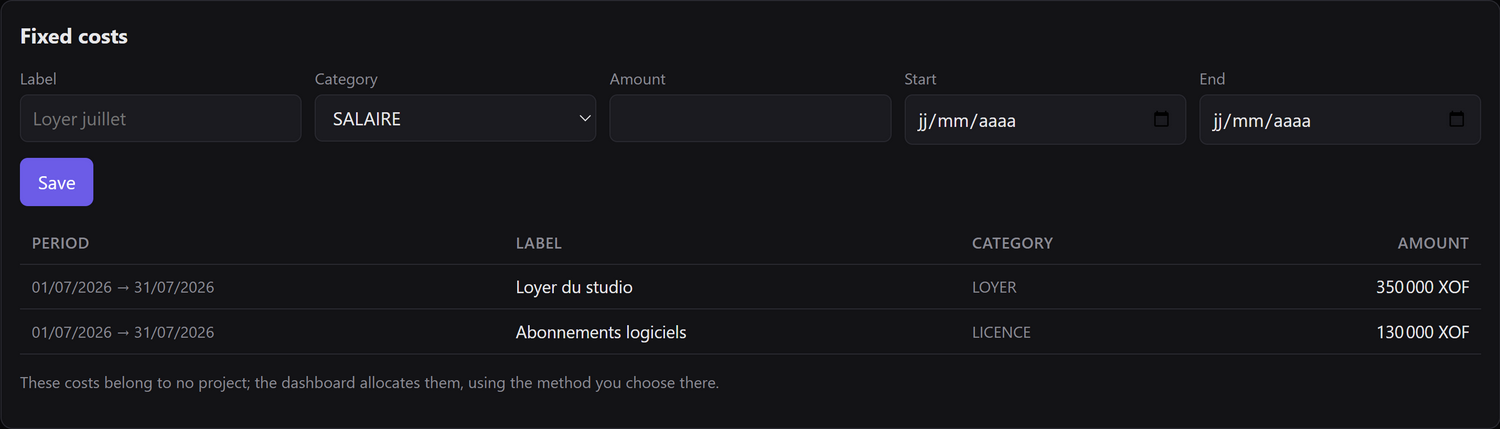
Set the fixed costs
Rent, subscriptions, salaries: what runs over a period, not over a project. These are the amounts the dashboard then allocates across projects — pro rata by minutes, by cost, or not at all.
Set the rates for each role
Set once what each role costs, so it never has to be retyped per project. · 3 minutes
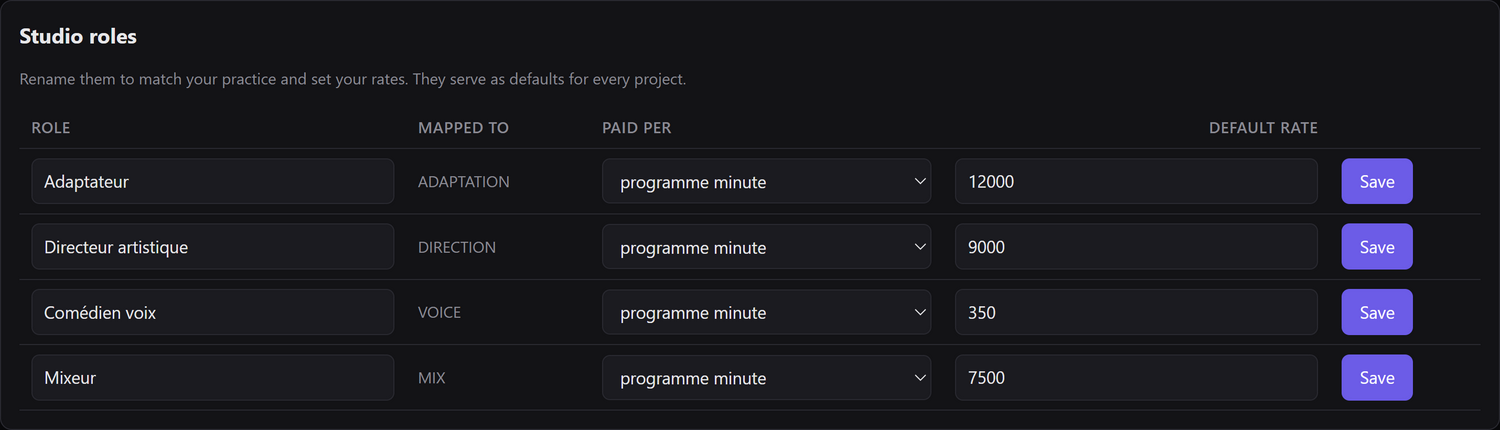
Create a role
The name is yours — “Sound engineer” if that is what you call it. The category, however, is picked from six: it is what lets the dashboard state what adaptation costs, whatever name you gave it.
Paid by decides the maths: the *programme minute* for almost every role, the *line* for voice actors, the *flat fee* when the work counts in neither.

Adjust the rates
These rates are the defaults for every assignment: they can still be changed project by project without touching the role. Renaming a role does not change its category, so it does not disturb the dashboard’s comparisons.
Connect the studio and track licences
Stop retyping episodes, and know where the licence pool stands. · 4 minutes
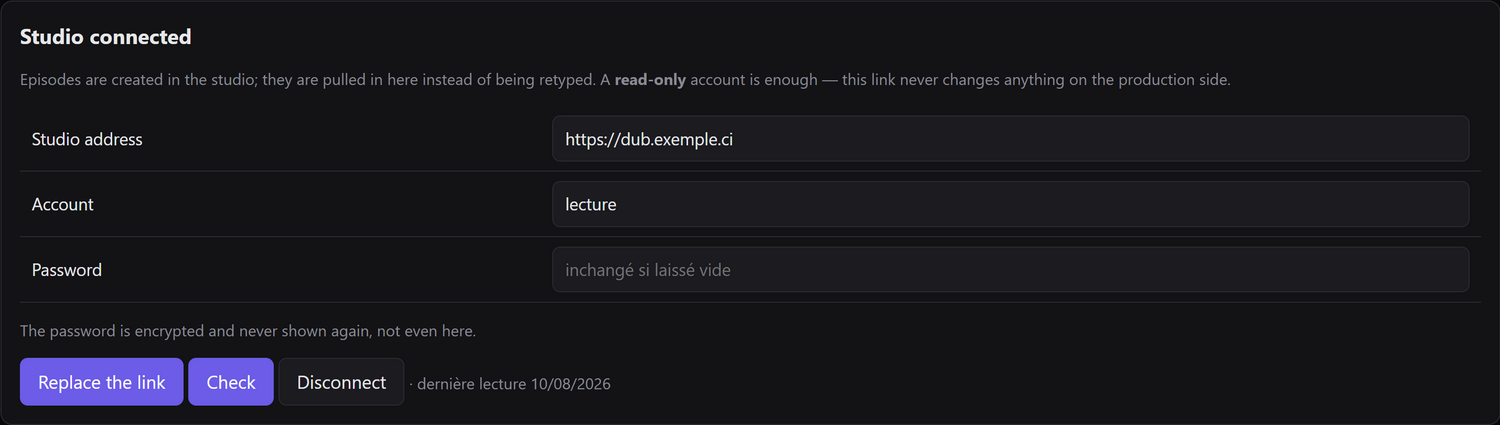
Connect the production studio
Episodes are created in the studio; they are pulled in here instead of being retyped. A read-only account is enough: this link never changes anything on the production side.
The password is encrypted and never shown again, not even here. If the application key changes, the console says so and asks for it again rather than failing silently on every read.
Read the licence pool
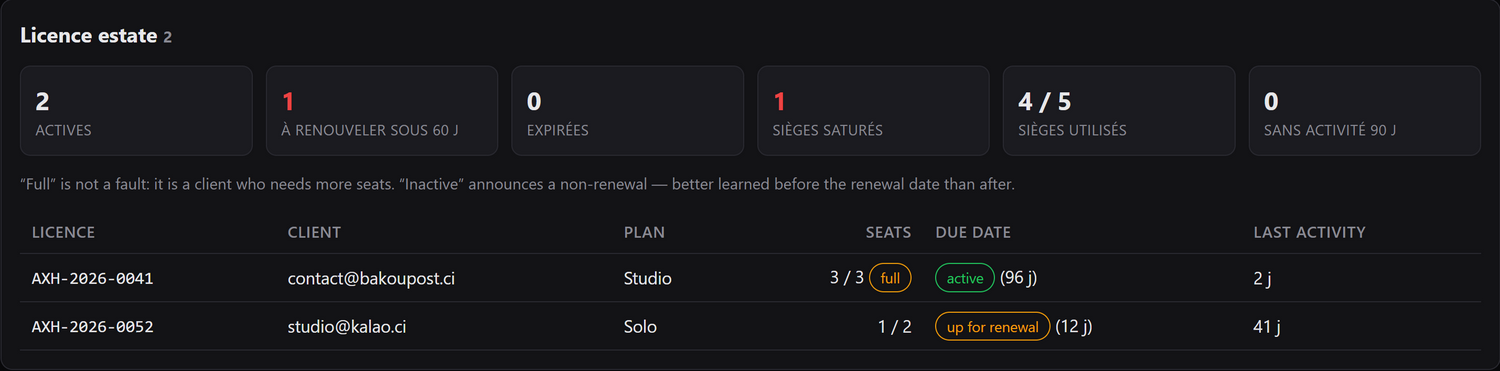
How many licences are sold, which are nearing expiry, which are saturated. Nothing is copied here: the pool is read on demand from the licence server, which stays the only source.
“Saturated” is not a fault: it is a client who needs more seats. “No activity” announces a non-renewal. Better learned before the expiry date than after.
Contractor side: receive and deliver
The invited voice actor, mixer or adapter: what they see, and what is expected of them. · 2 minutes
See what you have been given
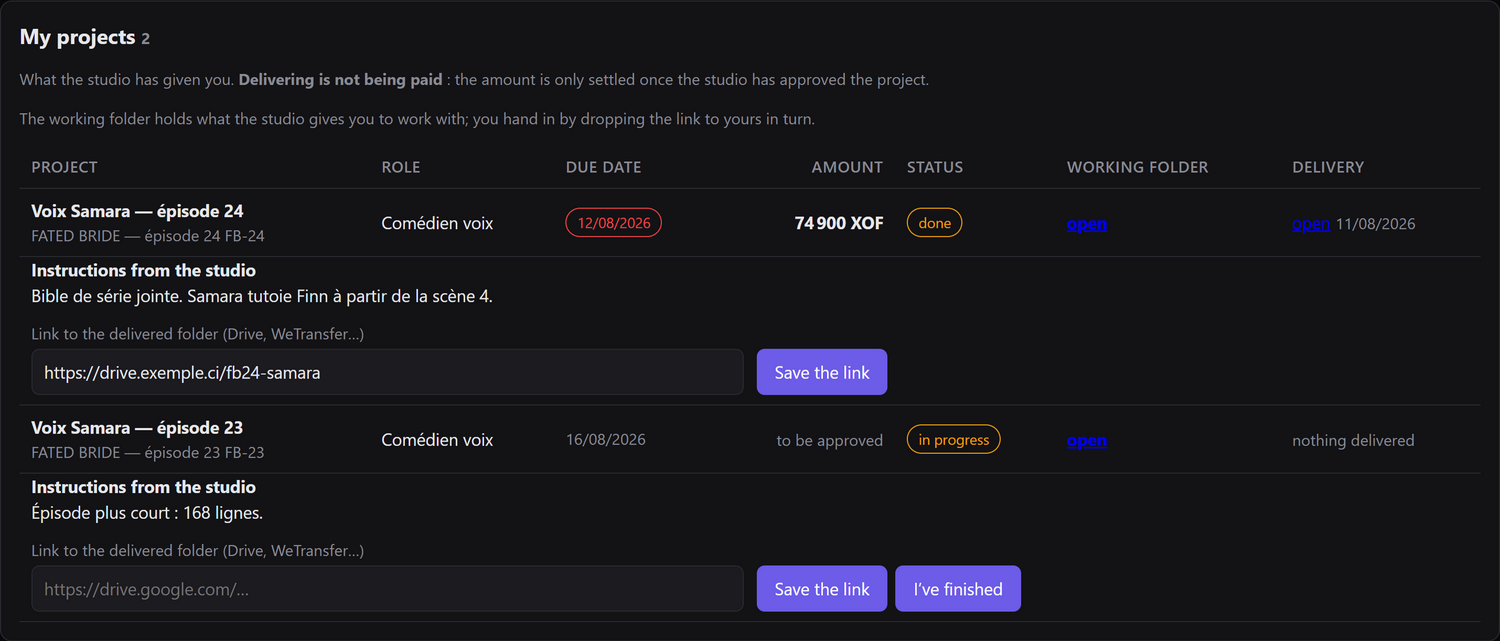
A contractor has only two tabs: their work and their invoices. The rest of the console is none of their business, and it is removed rather than left there to refuse them.
The working folder holds what the studio provides — video, DetX, script, series bible — and the instructions say what to know before starting.
Submit the delivery
You deliver by pasting the link to the delivered folder, then marking I’ve finished. Delivering is not being paid: the amount is only fixed once the studio approves the work.
